 |
Annotations provide a way of marking out relevant parts of an audio track with
graphic flags and textual information. As you are transcribing a recording,
annotations allow you to better keep track of parts of the recording that are
important.
By clearly marking regions of the recording with flags, you can quickly find
sections of audio with just a single click of the mouse. During playback, you
can conveniently navigate and review specific portions of the audio marked by
the annotations.
|
|
Adding Annotations
|
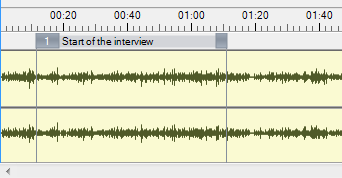
To add an annotation, select a section of audio by left-click and dragging the
mouse in the Track View. That will produce a rectangular highlighted area on the
Track View. Next, click on the “Annotation>Add Annotation" menu item.
|
|
Editing Annotations
|
|
To edit an annotation, click on an annotation flag to select it. The
number/index in the annotation flag should turn red indicating that the
annotation is selected. Next, click on the “Annotation>Edit Annotation…" menu
item. This will open the Annotation Editor:
|
|
|
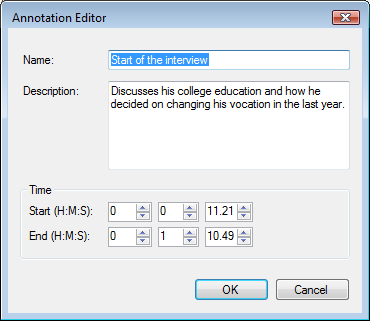
The Annotation Editor lets you change information about the annotation. This
includes the name, which is the text that is displayed in the Track View. You
can also add a description and modify the start and end time of the annotation
region. After you edit, the Track View graphics will be updated.
|
|
|
Removing Annotations
|
To remove an annotation, click on an annotation flag to select it. The
number/index in the annotation flag should turn red indicating that the
annotation is selected. Next, click on the “Annotation>Remove Annotation" menu
item.
|
|
Annotation Manager
|
To open the Annotation Manager, click on the “Annotation>Annotation Manager…"
menu item.
|
|
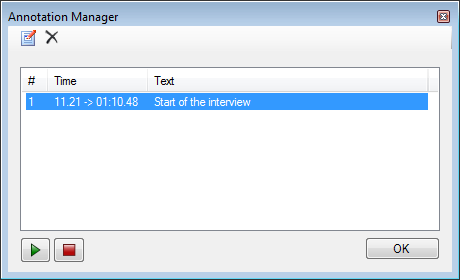
The Annotation Manager displays a list of all annotations associated with an
audio recording. In this display, you can select an annotation by left-clicking
on an item in the list with your mouse. You also have the option of playing the
audio associated with the annotation by clicking on the Play button.
You can also edit the annotation by clicking on the “Edit" toolbar button in the
Annotation Manager. In addition, you can remove an annotation by clicking on the
“Delete" toolbar button.
|
|
Navigating with Annotations
|
With the Annotation Manager open, you can simply click on an annotation in the
list display and it will automatically navigate and select the associated region
on the Track View. This makes it very convenient to find previously bookmarked
parts of a recording.
You can also use the Navigation buttons in the Track View or use the
“Navigation>Previous Annotation" and “Navigation>Next Annotation" menu items to
backward or forward between annotations.
|
|
|
|
Click to Go Back
|
|